
This article covers these topics:
- Creating a new quota
- Changing quotas when the survey is live
- Performing quota checks
- Monitoring quotas
Creating a new quota
Quotas are defined as part of the question properties. When editing a question, switch advanced view to ON, and enter the required quota to each choice in the quota boxes provided. (it's the last box of each Choice)
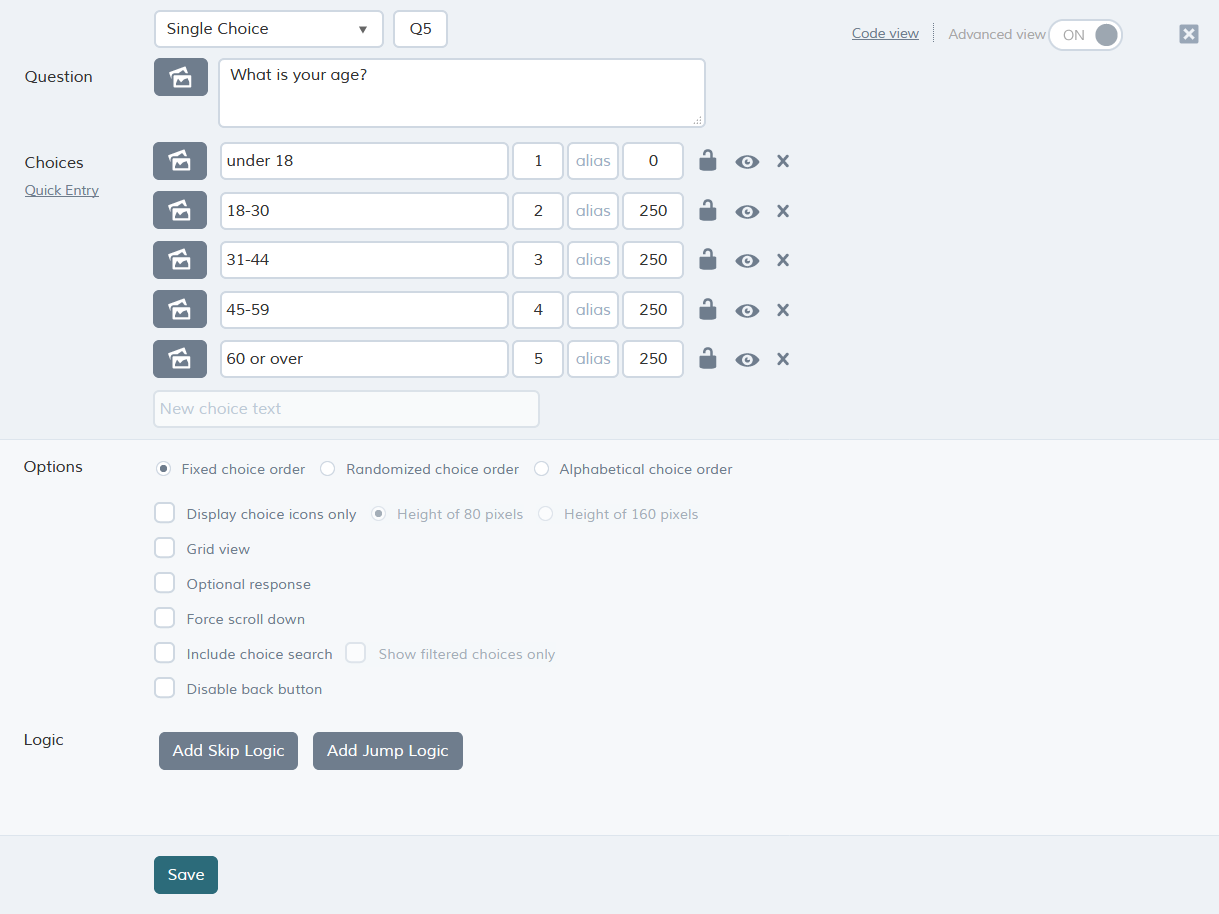
Once you have entered your quotas, click save to store them.
Changing quotas when the survey is live
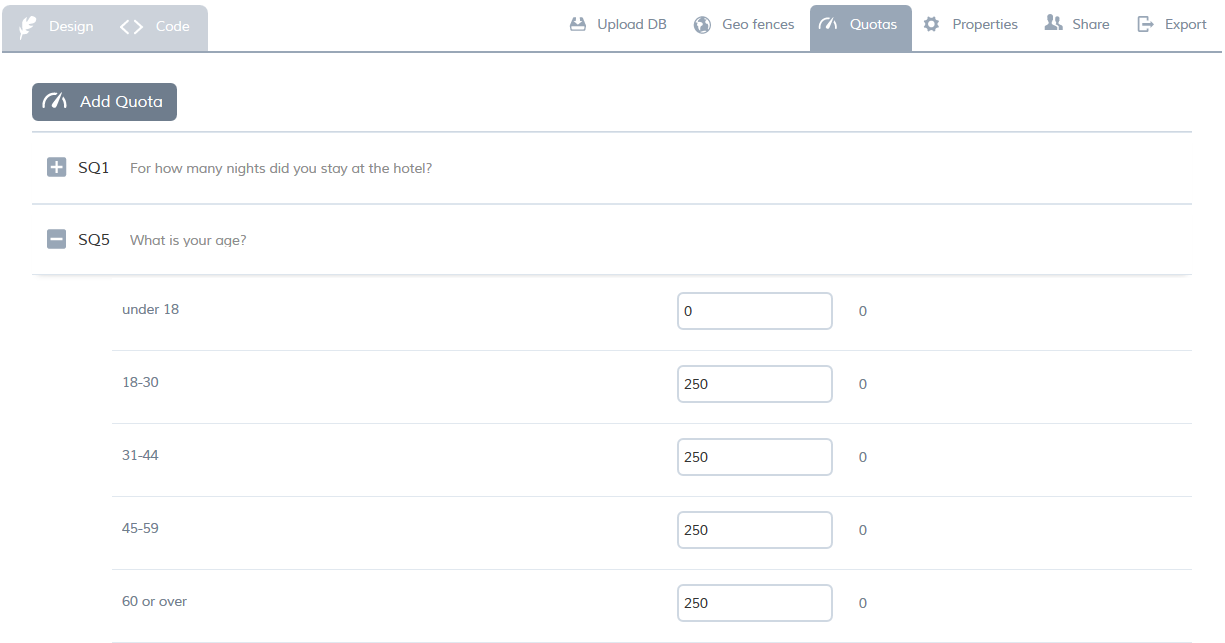
You can change the quota target while the survey is live. However, you must do this from the quotas screen (when the project is open, go to the Quotas menu at the top, as shown below):
Any quotas you have already defined are displayed. Click + to view the details of a quota. The quota amount (target) for each answer choice is displayed, and you can edit them by typing in a new number.
Whenever the respondent opens the app, and he or she is online, the survey quota check will update according to the new targets you have set for that survey.
Performing Quota checks
It is possible to set up scripting to perform quota checks. For details, please see performing quota checks.
Monitoring quotas
When your project is live or completed, you can view progress on your project's quotas. There are two ways to do this:
| Method | Description |
| In the quotas screen, as a count | To open the quotas screen, open your project and click quotas menu at the top. The quota amount (target) and quota achieved are shown for each choice. |
| In the reports screen, as a chart |
To open the reports screen, open your project and click see reports at the top right. Then, in the reports screen, click the quotas tab. To view a particular quota, at the right of the chart, click the quota. The chart then displays the details of that quota. You can hold the mouse pointer over an answer choice's bar to see the count and quota target for that answer choice. For more information on reporting, please see overview of metrics. |