
This article covers these topics:
- Introduction to managing respondents
- Adding new respondents
- Adding a single respondent
- Adding respondents in bulk (importing respondents)
- Editing an existing respondent
- Deleting an existing respondent
- Moving or copying a respondent to a different list
Introduction to managing respondents
When you have a respondent list open, you can add new respondents, or manage the respondents in the list.
By default, when viewing a respondent list you can see all the respondents in the list. You can filter the list by clicking show filters. This displays all system default sample fields, along with your custom fields. You can select values for each field in order to filter the list. To remove these filters, simply click reset filters.

Adding new respondents
You can add respondents either...
- individually (see adding a single respondent), or
- in bulk, from a CSV file (see adding respondents in bulk).
Adding a single respondent
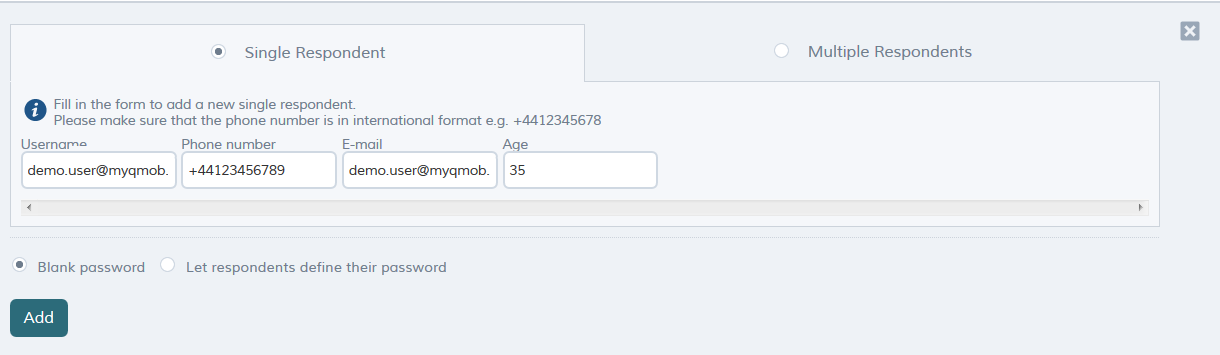
To add a respondent individually:
- When you have a respondent list open, at the top of the screen click add respondents.
- Enter values in the fields (username, phone number, email, etc.). Note that you must provide a username, and should also provide either a phone number or email (or both). Any other field is optional.
- If you want the respondent to be able to access the app without a password (this will be communicated to the respondent), select blank password. If you want the respondent to define a password when they are assigned to a project and they install the app, select let respondents define their password.
- Click add. The new respondent is added.
Adding respondents in bulk (importing respondents)
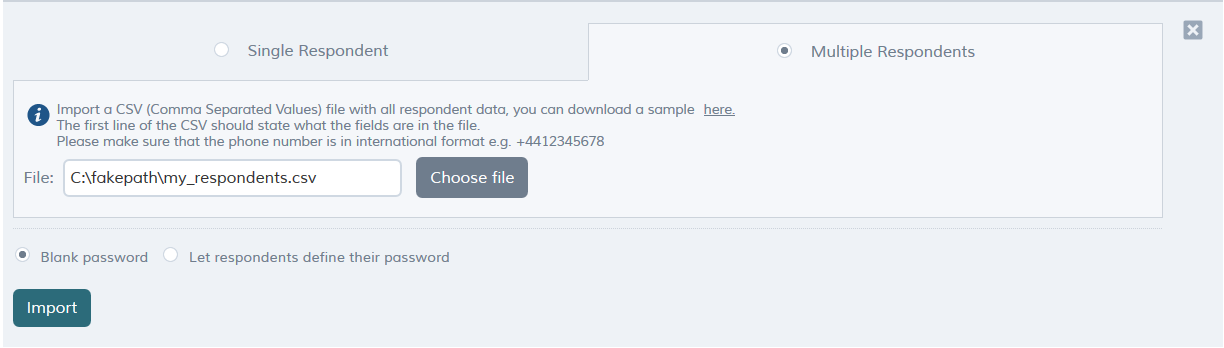
To add respondents in bulk:
- When you have a respondent list open, at the top of the screen click add respondents.
- At the top of the screen, click multiple respondents.
- Click choose file, and select the CSV file that contains your sample. The first line of the CSV file should contain the field names, separated by commas. Each subsequent line should contain a respondent record, with field values separated by commas. Any telephone numbers should be in international format, e.g. +4412345678. Note that you can click the provided link to download an example sample file.
- If you want respondent to be able to access the app without a password (this will be communicated to the respondent), select blank password. If you want respondent to define a password when they are assigned to a project and they install the app, select let respondents define their password.
- Click import. Your sample is imported from the file.
Editing an existing respondent
To edit the details on an existing respondent:
- In the respondent list, click the respondent whose details you wish to edit.
- At the top of the list, click edit.
- Enter new values for the respondent. Note that you cannot change the username.
- Click save.
Deleting an existing respondent
To delete an existing respondent:
- In the respondent list, click the respondent.
- At the top of the list, click delete.
Moving or copying a respondent to a different respondent list
QMob makes it easy to move a respondent from one list to another.
To move or copy a respondent to a different list:
- In the respondent list, click the respondent.
- At the top of the list, click move to list (to remove the respondent from this list, and place him/her in another) or copy to list (to keep the respondent in this list, but also place him/her in another).
- Select existing list, and then select an existing list you want to place the respondent in. Alternatively, select new list; a new list list will be created with the respondent in it (this list will be titled undefined; you will need to edit it to change the name).